2015 Goal Visualization Quilt
When I made my 2014 Goal Visualization Quilt, I thought maybe I was at the beginning of a series. I typically start each new year with a list of resolutions or measurable goals or whatever you want to call them, so why not document them in quilt form? I knew that I would have to really simplify my designs if I were to make this a yearly project, since my first goal visualization quilt took me 3 years to complete. So I set about planning this series, each year writing down my resolutions and then sketching a visual representation for each year. And now, four years later, I’m finally getting around to making the quilts.

2015 Goal Visualization Quilt, 56” square
For 2015 I grouped my goals into 5 categories:
Strength for fitness related goals,
Center for things related to spirituality and mindfulness,
Work for goals related to finishing art/quilt projects,
Family for things I wanted to make time to do with my husband and kids, and
Routine for some simple daily self-care habits I wanted to build.

2015 Goal Visualization Quilt, label
I represented each goal as basically a box to be ticked. And X means I accomplished the goal for the year, an empty square means I did not. Even though at a lot of these boxes were empty at the end of the year, I still found it a valuable exercise. This process of “failure” helps me hone my goals each year and make them more realistic, helpful, and useful for me.
This quilt measures approximately 56” square. It was quilted by Nikki Maroon and Mitch Hopper took photos for me.

2015 Goal Visualization Quilt, detail

2015 Goal Visualization Quilt, back
Round and round improv curves --- summer mini quilt

Continuing with my series of seasonal mini quilts for our hallway, I made this mini quilt using summery colors from my stash and an improv curve technique. Earlier this year I made a quilt using improv techniques I learned from Sherri Lynn Wood. I can't share that quilt here until her book is published (my quilt was not accepted for the book but uses techniques described therein, so she has asked her many testers not to share until after the publication date). It also involved improv curves. For this mini, I used the same idea but extended it to the whole quilt, instead of using blocks.
The basic idea is to start with a square or rectangle, layer another over one of the corners, and cut the two pieces of fabric at the same time, creating a curve instead of a sharp corner. Sew those pieces of curved edged fabric together and iron. Then to the same thing on the next corner and continue around in a clockwise or counterclockwise manner (it doesn't matter which way you go). It's like building a log cabin block, but you are cutting free hand curves instead of using straight strips of fabric. I've included several pictures of my process in order to give you an idea of how I proceeded.
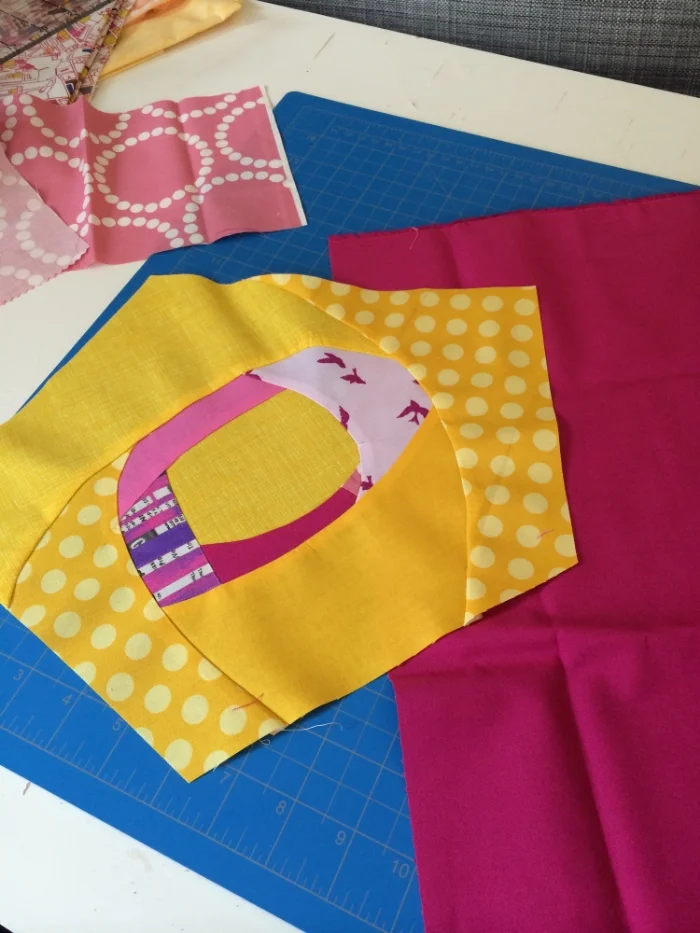


I wasn't sure this idea would work... then I saw this quilt on pinterest and it was very similar to the idea in my mind. It's always so interesting when you think you have imagined something and then you see someone else has already done it! I was happy to see this quilt because it let me know the quilt in my mind would be possible to make. I also think Kati did a great job on hers. I love her color choices.
This was not an easy one. It was really difficult to get the quilt to lay flat as I kept adding on curved sections. In the end I had to add a couple of darts to get it to lay flat (another technique I learned from Sherri Lynn Wood). The darts helped, and after it was washed I blocked the quilt to further help it lay flat.

You can see how wobbly and not-flat this thing was...

Blocking the quilt.
I like the improv curve style of this quilt. However, when I hung it in the hallway, it immediately struck me that it looked like a big piece of tie-dyed cloth. And guess what. I hate tie-dye. And unfortunately, once I saw it, I couldn't unsee it. I think, perhaps, that the colors I chose were responsible for this look of tie-dye. They were too harsh, maybe, too jarring. I should have used some more neutrals and lighter values, perhaps.
I ended up not being very happy with this quilt. I was glad when summer was over and I could take it down and put up something else. Maybe I will try my hand at another summer mini before next year. I will have to put some thought into what makes a good summery color palette.
Even though it wasn't my favorite, it was a good learning experience, as always. Onward.